As we stated in our first and second (now obsolete) theme translation tutorials, translating WordPress themes is actually very easy. With the help of some screenshots and some simple guidelines you’ll have your theme translated in no time.
This time around we’ll find a new way of translating themes (and plugins). This procedure does not require you to play with files (too much) or install programs. All you need is the Loco Translate plugin for WordPress.
Step 1 – Install Loco Translate plugin
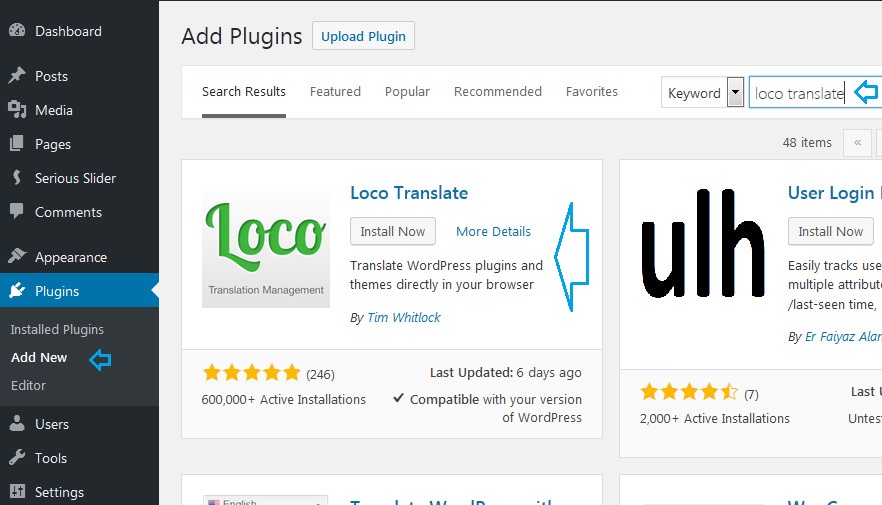
If you’re not familiar with installing plugins, all you need to do is go to Plugins » Add New in your WordPress dashboard. Type in “loco translate” to search for it, and install the plugin by clicking on the Install Now button in the returned results, then activate it.
Step 2 – Start a new translation
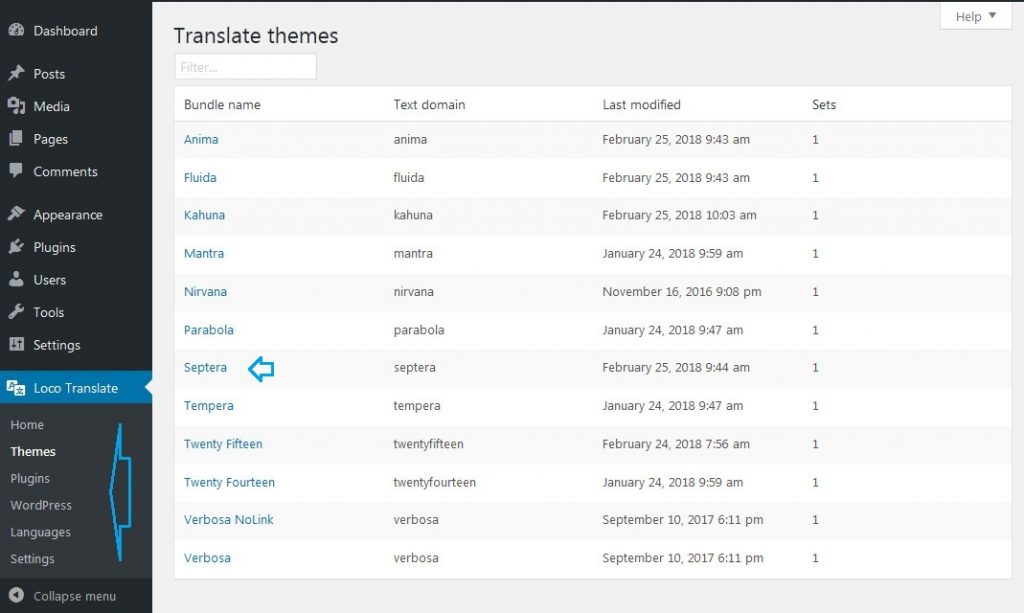
Navigating to Loco Translate » Theme (or Plugin or WordPress) will open up the plugin’s administration page. There you will see listed all translatable extensions (and WordPress).
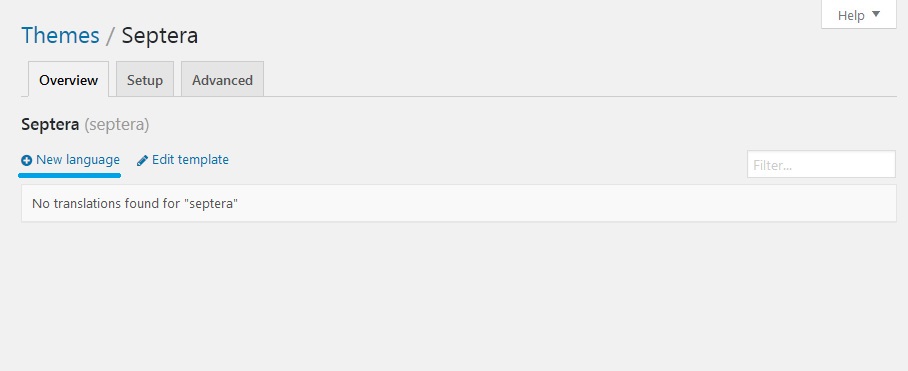
Click the desired extension name (for this tutorial I picked Septera) and click on the New Language button.
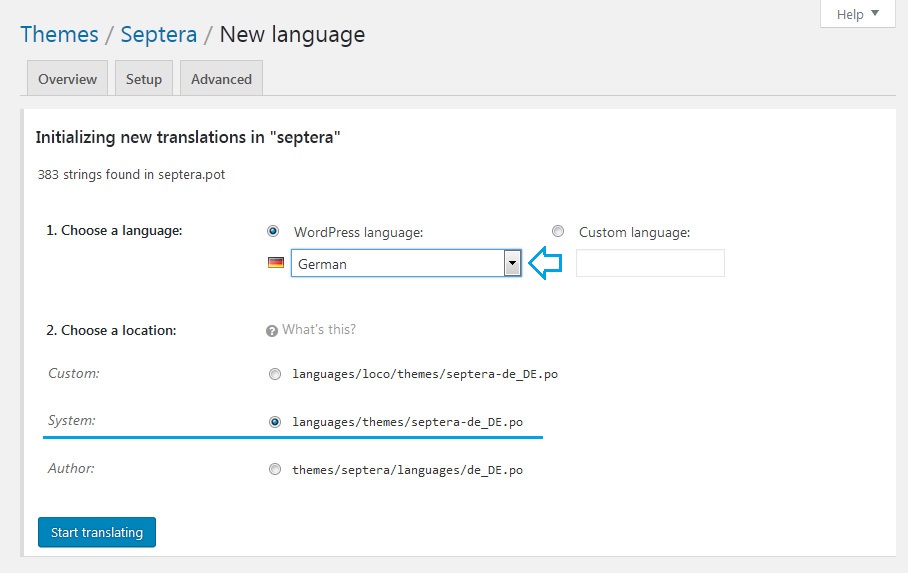
In the next step, select the desired language from the dropdown (or use a custom language code) and make sure to select the System location for the translation files. This will ensure that the translations would not be lost on a future extension update. Then Start translating.
Step 3 – Translate the theme
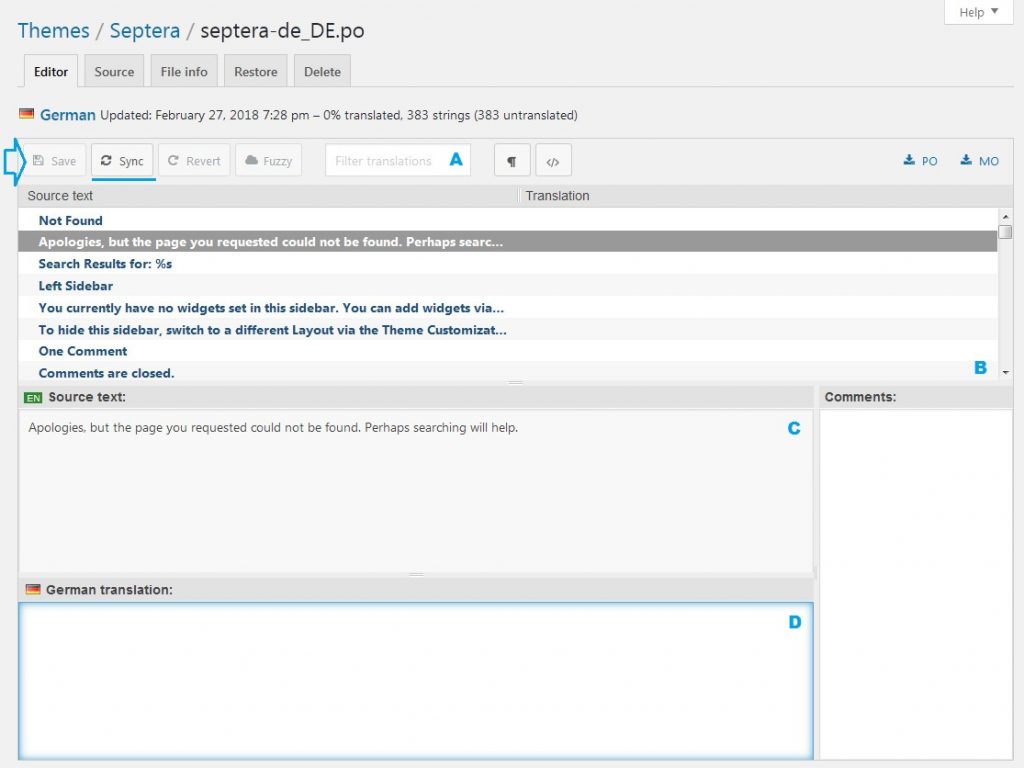
Loco Translate will here list all theme (or extension) strings and provide the interface to translate them all. You can search for a specific string by typing part of the text in the input field (A) or select it from the list (B).
You can see the original string in the upper field (C) and type in the desired translation in the lower field (D).
When you’re done or any time you want to take a break and save your work click the Save button in the upper left part of the screen.
You can always return to editing mode later by clicking the language name in the list of available translations.
Step 4 – Tell WordPress to use your new language
If you haven’t already done so, go to your WordPress dashboard >> Settings >> General and select your language.
Step 5 – You’re done
This is it. If you’ve got everything right (the codes, the files) refreshing your site will render it with your fresh new translations.
And remember we always love including your hard precious work with our extensions so everyone can benefit from it 😉


